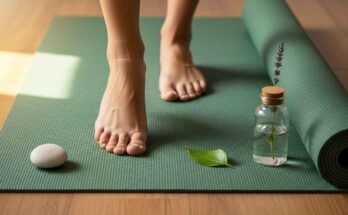
Yoga is more than just a workout; it’s a journey toward balance, strength, and mindfulness. But let’s face it: not every pose feels accessible right away. That’s where yoga blocks come in as unsung heroes of the practice. These simple props can transform a challenging stretch into a rewarding one, allowing you to ease into deeper poses while maintaining proper form. Whether you’re a beginner building confidence or an experienced yogi pushing boundaries, yoga blocks provide the support needed to go further without risking injury.
In this guide, we’ll dive into how to make the most of yoga blocks for deeper stretches and enhanced support. You’ll learn their basics, key benefits, practical applications in popular poses, and pro tips to elevate your sessions. By the end, you’ll have actionable steps to integrate blocks seamlessly into your routine, answering those nagging questions like “Which height should I use?” or “How do I know if I’m using it right?” Let’s unroll our mats and get started.
Understanding Yoga Blocks: Your Practice’s Secret Weapon
Before we jump into techniques, it’s essential to grasp what yoga blocks are and why they matter. At their core, yoga blocks are rectangular props designed to add height and stability to your poses. They act like an extension of your body, bridging gaps between the floor and your limbs to promote alignment and accessibility.
Materials and Variations
Yoga blocks come in three main materials, each with unique perks:
- Foam Blocks: Lightweight and affordable, these are ideal for beginners. They’re soft yet firm, making them forgiving if you accidentally topple during a wobbly tree pose. Most measure about 9 inches by 6 inches by 4 inches, but they often come in low (around 3 inches), standard (6 inches), and high (9 inches) heights.
- Cork Blocks: Made from natural, eco-friendly cork, these offer a grippy surface that prevents slipping. They’re denser than foam, providing a solid feel that’s great for restorative poses. Cork’s natural texture also absorbs sweat, keeping things stable in heated sessions.
- Wooden (or Bamboo) Blocks: For a premium touch, wooden blocks deliver unmatched durability and a premium aesthetic. They’re heavier, which can anchor poses like warrior lunges, but their weight might not suit travel. Sizes are similar to cork, with the added bonus of a smooth, polished finish.
Shapes are mostly rectangular, but some brands offer curved or wedge designs for targeted support, like under the knees in child’s pose. Start with a set of two foam blocks if you’re new; they’re versatile and budget-friendly.
Why Height Matters
The magic of blocks lies in their adjustability. A high block lifts you further for deeper hip openers, while a low one offers subtle props for balance. Stack them for custom heights, turning one prop into a dynamic tool. Think of blocks not as crutches, but as ramps guiding you toward unassisted mastery.
The Key Benefits of Yoga Blocks in Your Practice
Incorporating blocks isn’t about taking the easy way out; it’s about smart progression. Here’s how they deliver real value.
First, they enable deeper stretches safely. In forward folds, placing a block under your hands shortens the distance to the floor, letting your hamstrings release without forcing your back to round. This reduces strain on muscles and joints, allowing you to hold poses longer and breathe deeper.
Second, blocks enhance alignment and posture. Poor form can lead to imbalances over time, but props keep your spine neutral and hips squared. For instance, in triangle pose, a block under your bottom hand ensures your torso stays open rather than collapsing sideways.
Third, they’re a game-changer for inclusivity across levels. Beginners gain confidence without frustration, while advanced practitioners use them for precision in inversions or arm balances. They’re especially helpful for those with limited flexibility, injuries, or conditions like arthritis, modifying poses to fit your body’s needs.
Finally, blocks promote injury prevention and recovery. By supporting weight distribution, they take pressure off sensitive areas, like wrists in downward dog. Over time, this builds strength, so you rely less on props and more on your core stability.
Studies from yoga therapy circles emphasize that prop use correlates with fewer tweaks and better long-term adherence to practice. The result? A sustainable routine that feels empowering, not punishing.
Essential Poses to Master with Yoga Blocks
Now, let’s get practical. Below, I’ll break down five foundational poses where blocks unlock deeper stretches and superior support. For each, I’ll include step-by-step instructions, block placement, and modifications. Grab your blocks and follow along.
Triangle Pose (Trikonasana): Opening the Sides
Triangle pose stretches the inner thighs, hamstrings, and sides of the torso, but tight hips often make it feel lopsided. A block here creates space for a fuller extension.
- Stand with feet wide apart, about 4 feet, toes pointing forward.
- Turn your right foot out 90 degrees and left foot in slightly. Inhale to lengthen your spine.
- Exhale and hinge at your right hip, reaching your right hand toward your right shin or ankle.
- Place a block on its lowest setting outside your right foot. Rest your right hand on it, stacking your shoulders.
- Extend your left arm skyward, gazing up if comfortable. Hold for 5-8 breaths, feeling the stretch along your right side deepen without strain.
Pro Tip: For extra support, place another block under your left hand if reaching overhead pinches your shoulder. Switch sides. This setup aligns your spine vertically, preventing the common forward lean.
Warrior II (Virabhadrasana II): Grounding the Legs
This power pose builds leg strength and hip flexibility, but shallow stances limit the stretch. Blocks elevate your back hand for better chest opening.
- From a wide stance, turn your right foot out and left in 15 degrees.
- Bend your right knee over your ankle, sinking into a lunge. Arms extend parallel to the floor, gaze over right fingertips.
- Slide a block under your left hand at mid-height, just inside your left foot. Press into it to lift your chest.
- Roll your shoulders back, engaging your core. Breathe deeply for 30 seconds.
Modification: If balance wavers, use a high block under your back hand to shorten the reach, allowing focus on squaring your hips. Over weeks, lower the height as stability improves. This prop turns a shaky warrior into a fierce one, enhancing quad and inner thigh elongation.
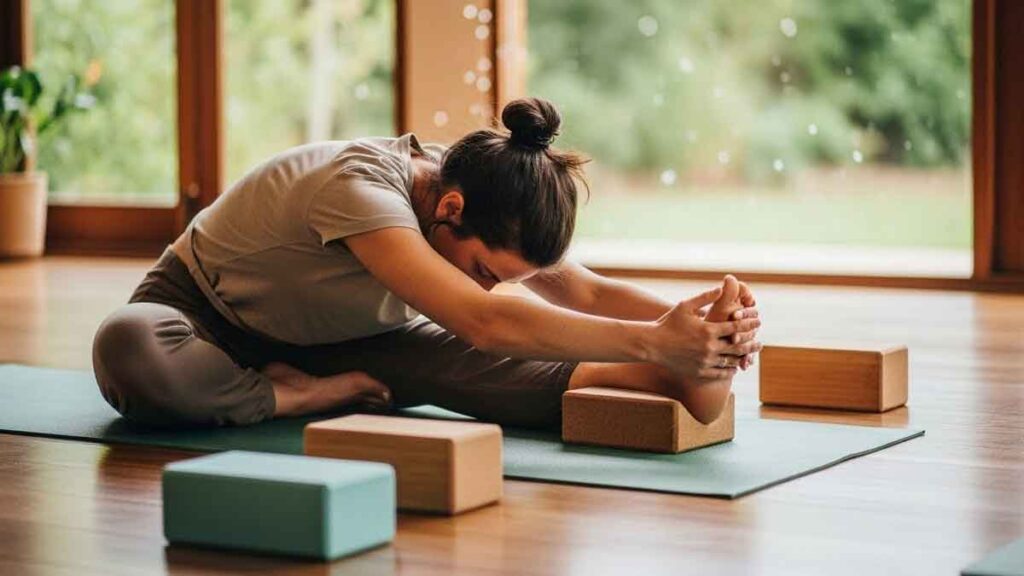
Seated Forward Bend (Paschimottanasana): Hamstring Harmony
Forward bends calm the nervous system but can compress the spine if you’re forcing it. A block between your feet brings the fold to you.
- Sit with legs extended, feet flexed and hip-width apart.
- Place a tall block vertically between your feet, at chest height when folded.
- Inhale to lengthen, then exhale forward, hands on the block. Fold from the hips, keeping your back straight.
- Rest forehead on the block if possible, or stack books atop for height. Hold 1-2 minutes.
Insight: The block supports your torso, letting gravity deepen the hamstring stretch without rounding. For tighter backs, sit on a folded blanket first. This pose becomes restorative, easing sciatica-like tension.
Bridge Pose (Setu Bandhasana): Lifting the Heart
Bridges energize the spine and glutes, but lifted hips demand core fire. Blocks under your sacrum provide passive support for longer holds.
- Lie on your back, knees bent, feet hip-width and close to hips.
- Place a block on its medium height under your sacrum (base of spine) as you lift hips.
- Walk feet in if needed, interlace hands under back, or rest arms by sides.
- Stay lifted for 5-10 breaths, rolling shoulders down.
Advanced Twist: For deeper backbend, use high setting and clasp ankles. This variation massages the spine gently, countering desk hunch. Beginners: Keep block low to build glute activation gradually.
Pigeon Pose (Eka Pada Rajakapotasana): Hip Liberation
Pigeon targets deep hip rotators, but intensity can overwhelm. A block under the front hip elevates for comfort and deeper release.
- From all fours, slide right knee forward behind right wrist, shin angling left.
- Extend left leg back, square hips. Place a block under right hip at low height.
- Fold forward over right leg, arms extended or stacked forearms on another block.
- Breathe into the stretch for 1 minute per side.
Customization: If the front hip lifts, add height; for ankle sensitivity, pad under the foot. This setup allows glutes to surrender fully, reducing lower back pull.
These poses showcase blocks’ versatility. Experiment in a 20-minute sequence, noting how support amplifies sensation without overwhelm.
Tips for Seamlessly Incorporating Yoga Blocks
To maximize value, treat blocks as practice partners. Start by selecting based on your needs: foam for portability, cork for grip. Invest in a strap too, for binding poses.
Clean them weekly with a damp cloth and mild soap; air-dry to prevent mold. Store upright to maintain shape.
Progressively: Week one, use blocks in every pose. By week four, challenge yourself to remove them midway. Track in a journal: “Felt 20% deeper in triangle today.”
Pair with breathwork: Inhale to set the block, exhale to settle. This mindfulness turns props into teachers.
For home studios, keep blocks within arm’s reach. Online classes often demo prop use; follow along to refine.
Common Mistakes and How to Sidestep Them
Even pros slip up. Avoid over-relying on blocks, which can stall progress; use them as 70% of sessions max.
Don’t choose wrong heights: Too high strains shoulders; too low offers no aid. Test by ensuring your spine stays long.
Misplacement is sneaky: In lunges, blocks should align with your body’s natural line, not force twists. Mirror check helps.
Lastly, ignore tension signals. If a prop pinches, adjust immediately. Yoga’s about listening, not enduring.
FAQ: Your Yoga Block Questions Answered
Q: Can yoga blocks help with back pain? A: Absolutely. They support neutral spine in folds and twists, reducing disc pressure. Start with gentle poses like supported bridge, consulting a doctor for chronic issues.
Q: How many blocks do I need to start? A: Two is ideal for symmetry in standing poses. One works for seated work, but pairs enhance balance.
Q: Are there blocks for aerial or hot yoga? A: Yes, sweat-resistant cork or EVA foam suit humid environments. Avoid wood in inversions due to slip risk.
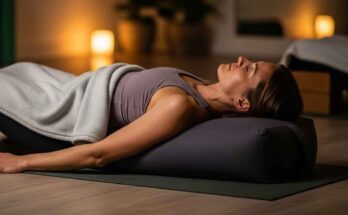
Q: What’s the difference between a block and a bolster? A: Blocks are firm, rectangular for precise propping; bolsters are cylindrical and softer for full-body support like in savasana.
Q: Can kids or seniors use yoga blocks safely? A: Definitely, with supervision. They make poses fun and accessible, preventing overstretch in growing bodies or easing joint stress in elders.
There you have it: a roadmap to unlocking yoga’s full potential with blocks. Your practice will feel more intuitive, stretches more profound, and support more reliable. Roll out that mat today, and notice the shift. Namaste, and keep flowing.